Last year we helped our clients move more than 5,000 pages from one content management system to another. We moved each page manually — and learned a lot about best practices and pitfalls.
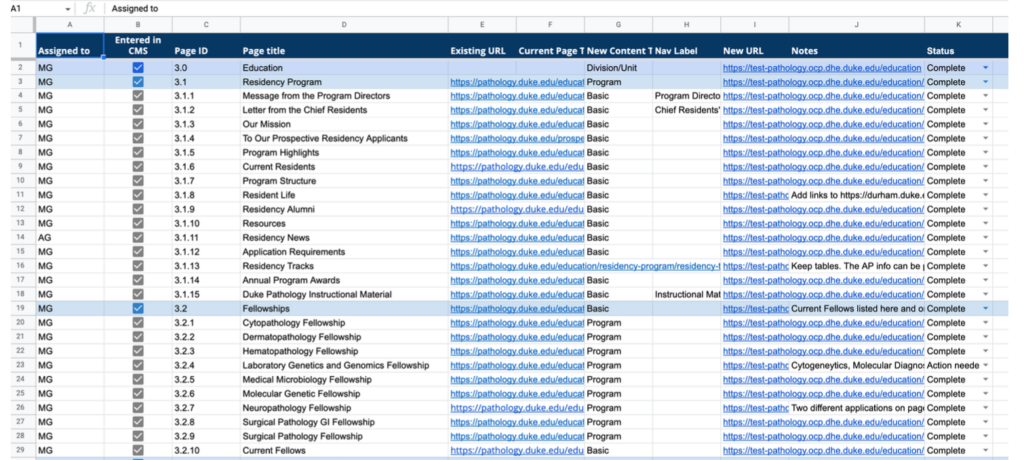
I previously talked about how important planning is in this process. Coming out of our planning work, we have a content entry spreadsheet that will help us keep all the moving parts in line: from assigning who works on a page to tracking old and new URLs and much more.
Now let’s get to the heart of the matter: the actual migration. As you start the migration, here are some things to keep in mind.
Assign similar work for consistency
If you’ve got a large site and need the help of multiple people to migrate it, we recommend assigning similar kinds of content to a person: one person who does services, and another who does locations, for example. This will improve consistency across pages — no matter how well you document how to migrate the content, everyone will bring their own style to it.
Create the new pages first
Before we begin moving content, we like to create all the pages on the new site. This allows us to create links to the new pages when we move the content rather than going back and updating the links later. As you create each page, paste the new URL into the content entry spreadsheet so you can easily access it later.
Download, upload, copy, paste — and interpret
Most likely you will need to move all files, images, and other assets as part of your migration. For each page, we begin by downloading those assets. This is a good time to evaluate quality: is the image size good enough for the new site? Does that PDF really need to be that large?
You’ll need to upload those files to the new site. Then you can copy the text and paste it into the new site.
It’s rarely a one-to-one match though — you’ll have new modules on the new site and having people familiar with the capabilities of each can help you make the most of your new CMS. This is when a migration becomes an art as well as a science.
Use relative links
To prevent problems later, make sure any links to internal pages are relative — leaving off the domain. You’re probably building out your new site on a staging server, so if you use absolute links, every internal link will break when you move it to the live server (more on that when we talk about QA).
Check your source
As you’re pasting your content into the new site, remember to check the source code from time to time. It’s possible that the HTML on the old site has some unnecessary tags — especially those annoying <span> tags — that aren’t needed. Cleaning up your HTML will help eliminate oddities that will bug you later.
Track issues
We include a notes field in the content entry sheet. This helps us keep track of issues we encounter during the migration. We note the issues or questions and keep moving so we can come back later. If we tried to deal with all the little things that crop up as they happen, the project would stall.
Review and improve
Have someone — ideally a single person, if the project size allows it — review the pages once they’ve been entered. This improves consistency again — a reviewer can better see when one type of content has been migrated differently across pages, or a module is being used inconsistently.
Now, repeat the process. One by one, you’ll knock out pages until you’ve done them all — we promise, it will eventually happen! Once you’re finished don’t neglect the final step: QA. More to come on that in the third part of this series.

